Writing A Design Brief

To ensure we create the best possible design for your needs, please provide us with the following information:

  1. Introduction – Tell us about your company or organisation and what you do.
  2. Objectives and Goals – What are your objectives and goals for the new design? What do you aim to achieve through this design project?
  3. Communication and Target Audience – What message do you want to convey, and why is it important? Describe your target audience, including age, gender, views, employment, location, and lifestyle.
  4. Content and Visuals – Specify the text that needs to be included in the design and let us know if you will be providing this content. Additionally, mention any pictures, photographs, or diagrams to be used and their source.
  5. Project Details – Is this a completely new design, or are you updating existing materials? What will be the size of the design, and where will it be used (e.g. website, business cards, stationery, vehicle)?
  6. Design Preferences – Can you provide examples of designs you consider effective? Are there any specific styles you prefer or dislike?
  7. Budget and Schedule – Do you have a budget in mind? Knowing your budget helps us make the most of your resources. Also, please provide any deadlines or schedules for the project.
  8. Additional Information – Feel free to share any extra details or ideas that might be relevant to the project but were not covered in the questions above.

Supplying Artwork Created In Canva

We recommend that artwork is supplied as a high-resolution PDF with trim and bleed which can be achieved by clicking the Share Button and then Download.

You can make print-ready Canva designs in 3 simple steps

Step 1 – Set up your Canva margins

Why do I need my text to be in a margin

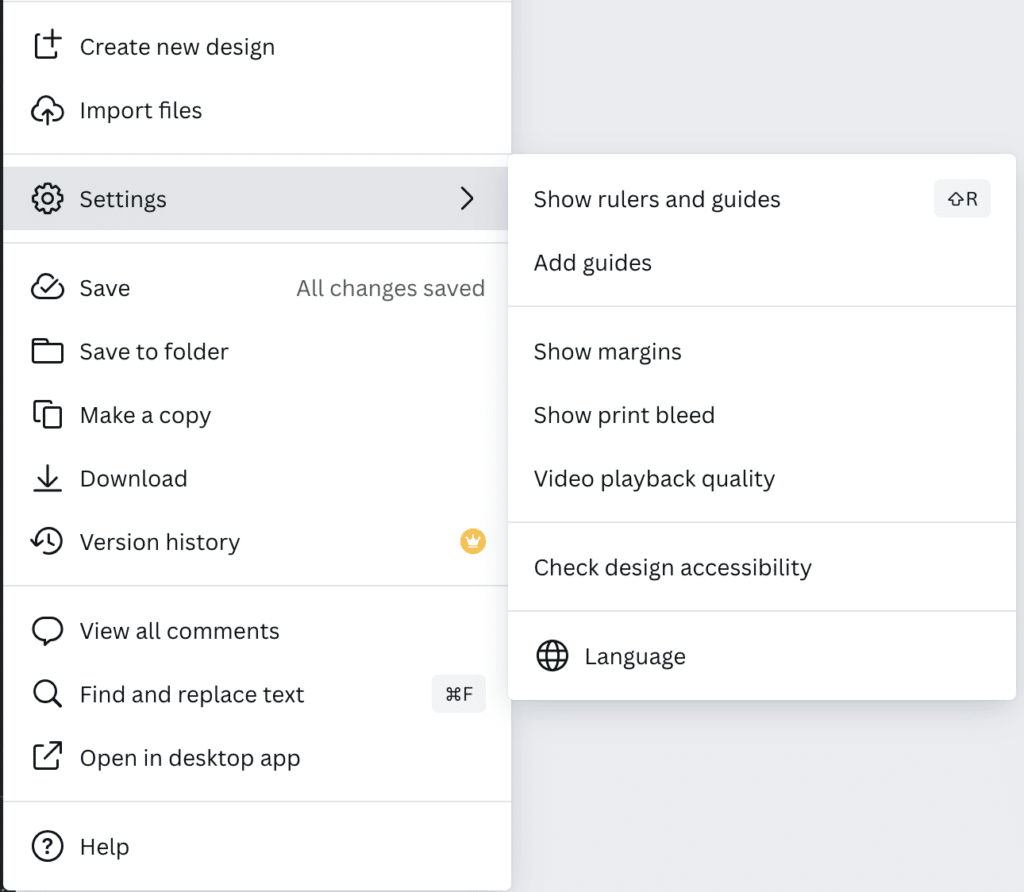
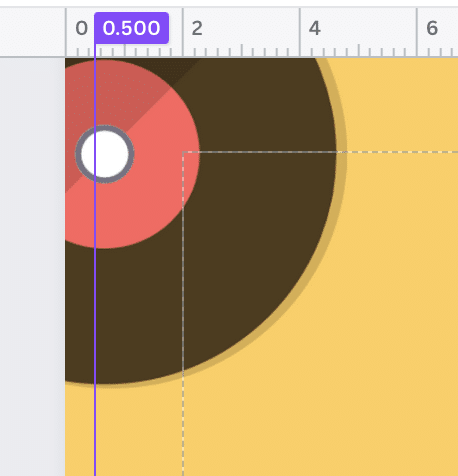
It is important to turn on the Show rulers and guides and margins to ensure any text in your design is within the print safe zone. Canva has a default margin which is quite wide. We recommend drawing guides that are 0.5m / 5mm and ensuring your text is within this margin. If text is outside of this margin it may be trimmed off.

Step 2 – Set up your Canva artwork to have 3 mm bleed

Why do I need bleed on my artwork file?

It is important to turn on the Show print bleed setting  to ensure your design is printed to the edge of the paper. If a printer uses a file without bleed, this may result in white lines around the edge of your artwork. 

How do I set up bleed in Canva?

To make your Canva design print-ready, you need to ensure the bleed area is set up. To do this, spread your content outside of the artwork area by dragging the borders out past the edge of the page. As shown in the image below – the bounding box for the background layer is sitting outside the visible artwork area.

Step 3 – Export your Canva design with crop marks

What are crop marks?

Crop marks are lines placed in the corners of your artwork to indicate where the paper should be trimmed.

How do I add crop marks to my Canva design?

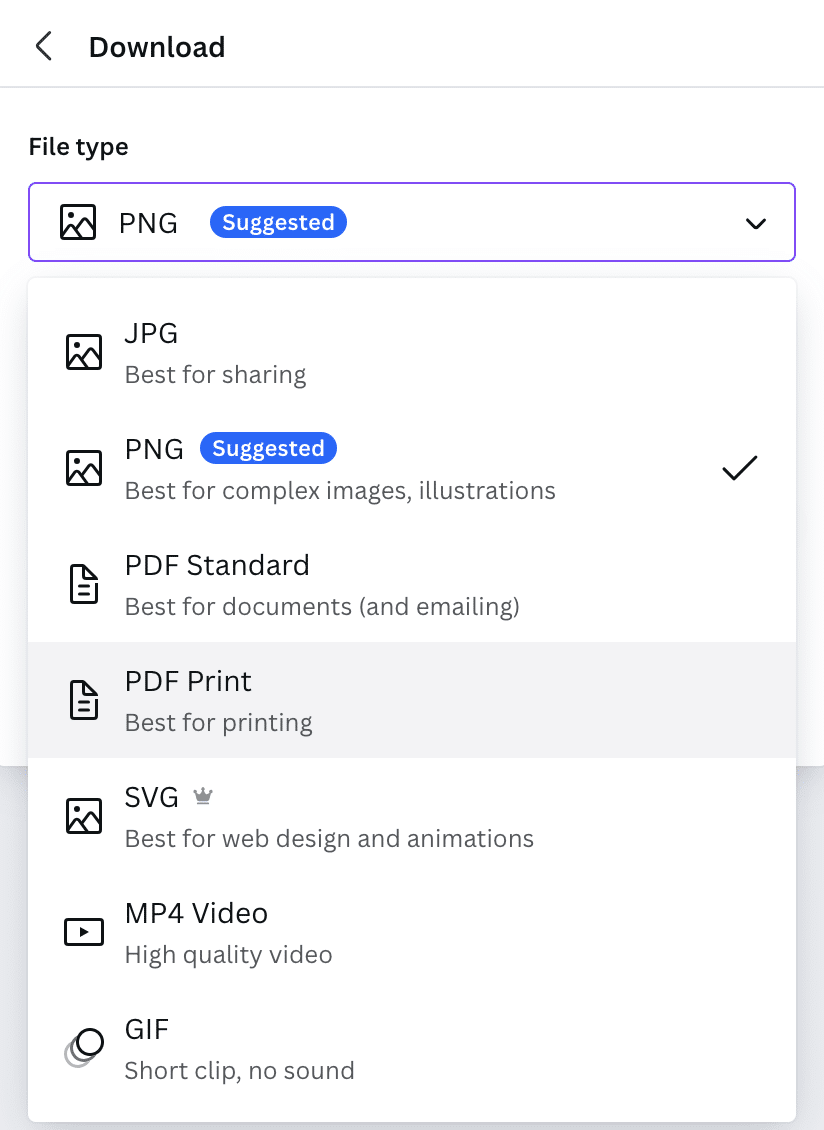
When you’re happy with your artwork, click the download button (located on the right-hand side of the top bar in Canva). Check the file type is set to ‘PDF print’ and tick the box labelled ‘Crop marks and bleed’. Then click the Download button.

When downloaded, the PDF file should have crop marks in each corner of your artwork.

Can I make my Canva design CMYK?

As Canva is an online editor, they only use the RGB colour profile. Your printer will need to convert this to a CMYK profile for you. Just let them know when you get your quote that you’ve worked in Canva so they’re aware. Please note, that when colour settings are changed, the colours in your artwork may look different when printed. If time permits, we can arrange a test print for you.

The best Canva artwork sizes for printing

When creating your artwork in Canva, it’s best to use custom sizing as this will make your design more cost-effective to print. We recommend inputting your own size using the custom sizing function – a list of common printing sizes are:

DL – 99 x 210 mm
A6 – 105 x 148 mm
A5 – 148 x 210 mm
A4 – 210 x 297 mm
A3 – 420 x 297 mm

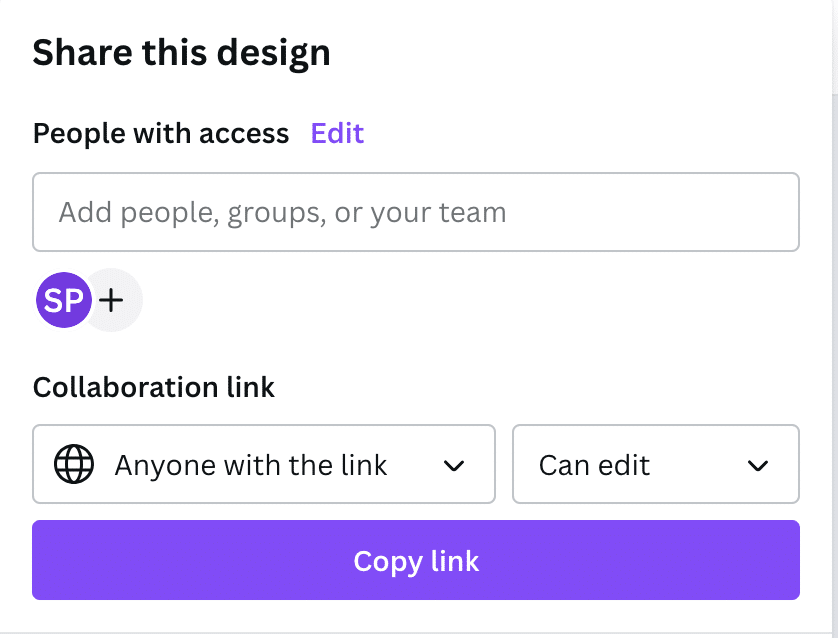
If you need help with your Canva design, please share the file to sales@sm1print.co.uk so we can collaborate or provide tips.

Cover image: Photo by cottonbro studio from Pexels

Supplying Artwork

File Formats

We usually recommend that artwork is supplied as a high-resolution Adobe Print-Ready PDF file. Using the PDF (or Portable Document Format) to save your artwork is the safest way to ensure that your work will be printed as expected with no unpleasant surprises. The only time we would rather receive ‘native’ files ie those supplied in the same format they were created in would be for Adobe Indesign files that you would like us to make changes to.

All design software allows you to save or export your artwork as high pdfs but if you do need to supply the native files, we advise how best to do so below.

PDF Files

It is important that you prepare your PDF file in the correct way. If there is a ’Press Quality’ option, you should choose this. These options must be set for commercial printing:

  • Resolution – Choose High Resolution
  • Compression Settings – For colour and greyscale this should be down-sampled to 300dpi with “auto compression” set on high
  • Font Embedding – Should be set to “embed all fonts”
  • Bleed – add 3mm bleed
  • Trim Marks

Colour needs to be set as CMYK, not RGB (RGB artwork will be converted to CMYK and this could affect your colours).

You can convert documents to PDF for free using this link from Adobe: https://www.adobe.com/acrobat/online/convert-pdf.html

  Illustrator

Either embed all linked images or supply them in a packaged file. Supply all fonts used or convert all text to curves. Make sure crop marks and 3mm bleed are added if necessary.


  Photoshop

Set Resolution to 300dpi when starting your new document. Colour needs to be set as CMYK, not RGB (RGB artwork will be converted to CMYK and this could affect your colours).

Save the file as either TIFF or JPEG.

Please note: If you need us to make changes to your file we will require you to re-supply artwork as a PSD file as we are unable to make changes to flattened images (JPEG / EPS / TIFF).

Make sure crop marks and 3mm bleed are added if necessary.


  InDesign

Please ensure all fonts and pictures used in your artwork are supplied to us in a separate folder using the “package” function under the “file” menu. Make sure 3mm bleed is added if necessary.

Compress the document using Stuffit or WinZip before uploading or sending your order via e-mail.

Please include a PDF. This is for our reference to make sure that nothing is missing or moved on the artwork supplied. Please note that this will be proofed first and could cause a longer delivery time.


  Microsoft documents

We do not recommend supplying artwork in the following formats as it often doesn’t print as expected due to font substitution and differences between versions.

If you supply Microsoft Word or PowerPoint files, there is a danger that missing fonts may be substituted as mentioned and the layout may also change depending on the version of the software and settings.

  • Word
  • Excel
  • PowerPoint
  • Works
  • Publisher

We would always strongly advise saving it as a PDF and supplying that instead.

Most versions of Microsoft Applications have a built-in PDF converter. Alternatively, you can upload your document to Adobe: https://www.adobe.com/acrobat/online/convert-pdf.html

It may be an idea to supply a screenshot of your Microsoft document before conversion so we can see if anything has changed or is missing. This can be done by the following:

  • PC operators – There is a “PRINT SCREEN” button on the keyboard
  • Mac operators – Press the “Apple” and “Shift 4” keys, then highlight the area you wish to copy. This saves a PNG copy to your desktop

Canva (and similar online design software)

Websites like Canva are great for unleashing your creativity but seldom allow the control required for commercial print. If you choose to use these applications, we request sending us a Print Ready PDF ensuring you have checked the bleed and margins. Canva guidance can be found on their website: https://www.canva.com/help/margins-bleed-crop-marks/ if you require edits to your file, we would require you to share the Canva link to sales@sm1print.co.uk

Bleed & Trim Marks

Printing to the Edge
If you want your design to go all the way to the edge of the page, we’ll need to print on paper or a card that’s larger than the final size and then trim it down with a guillotine. It’s important to note that slight movements during printing make it nearly impossible to cut through a stack of paper accurately without leaving white edges. To avoid this, include “bleed” and, if possible, trim marks in your artwork.

Bleed Explanation
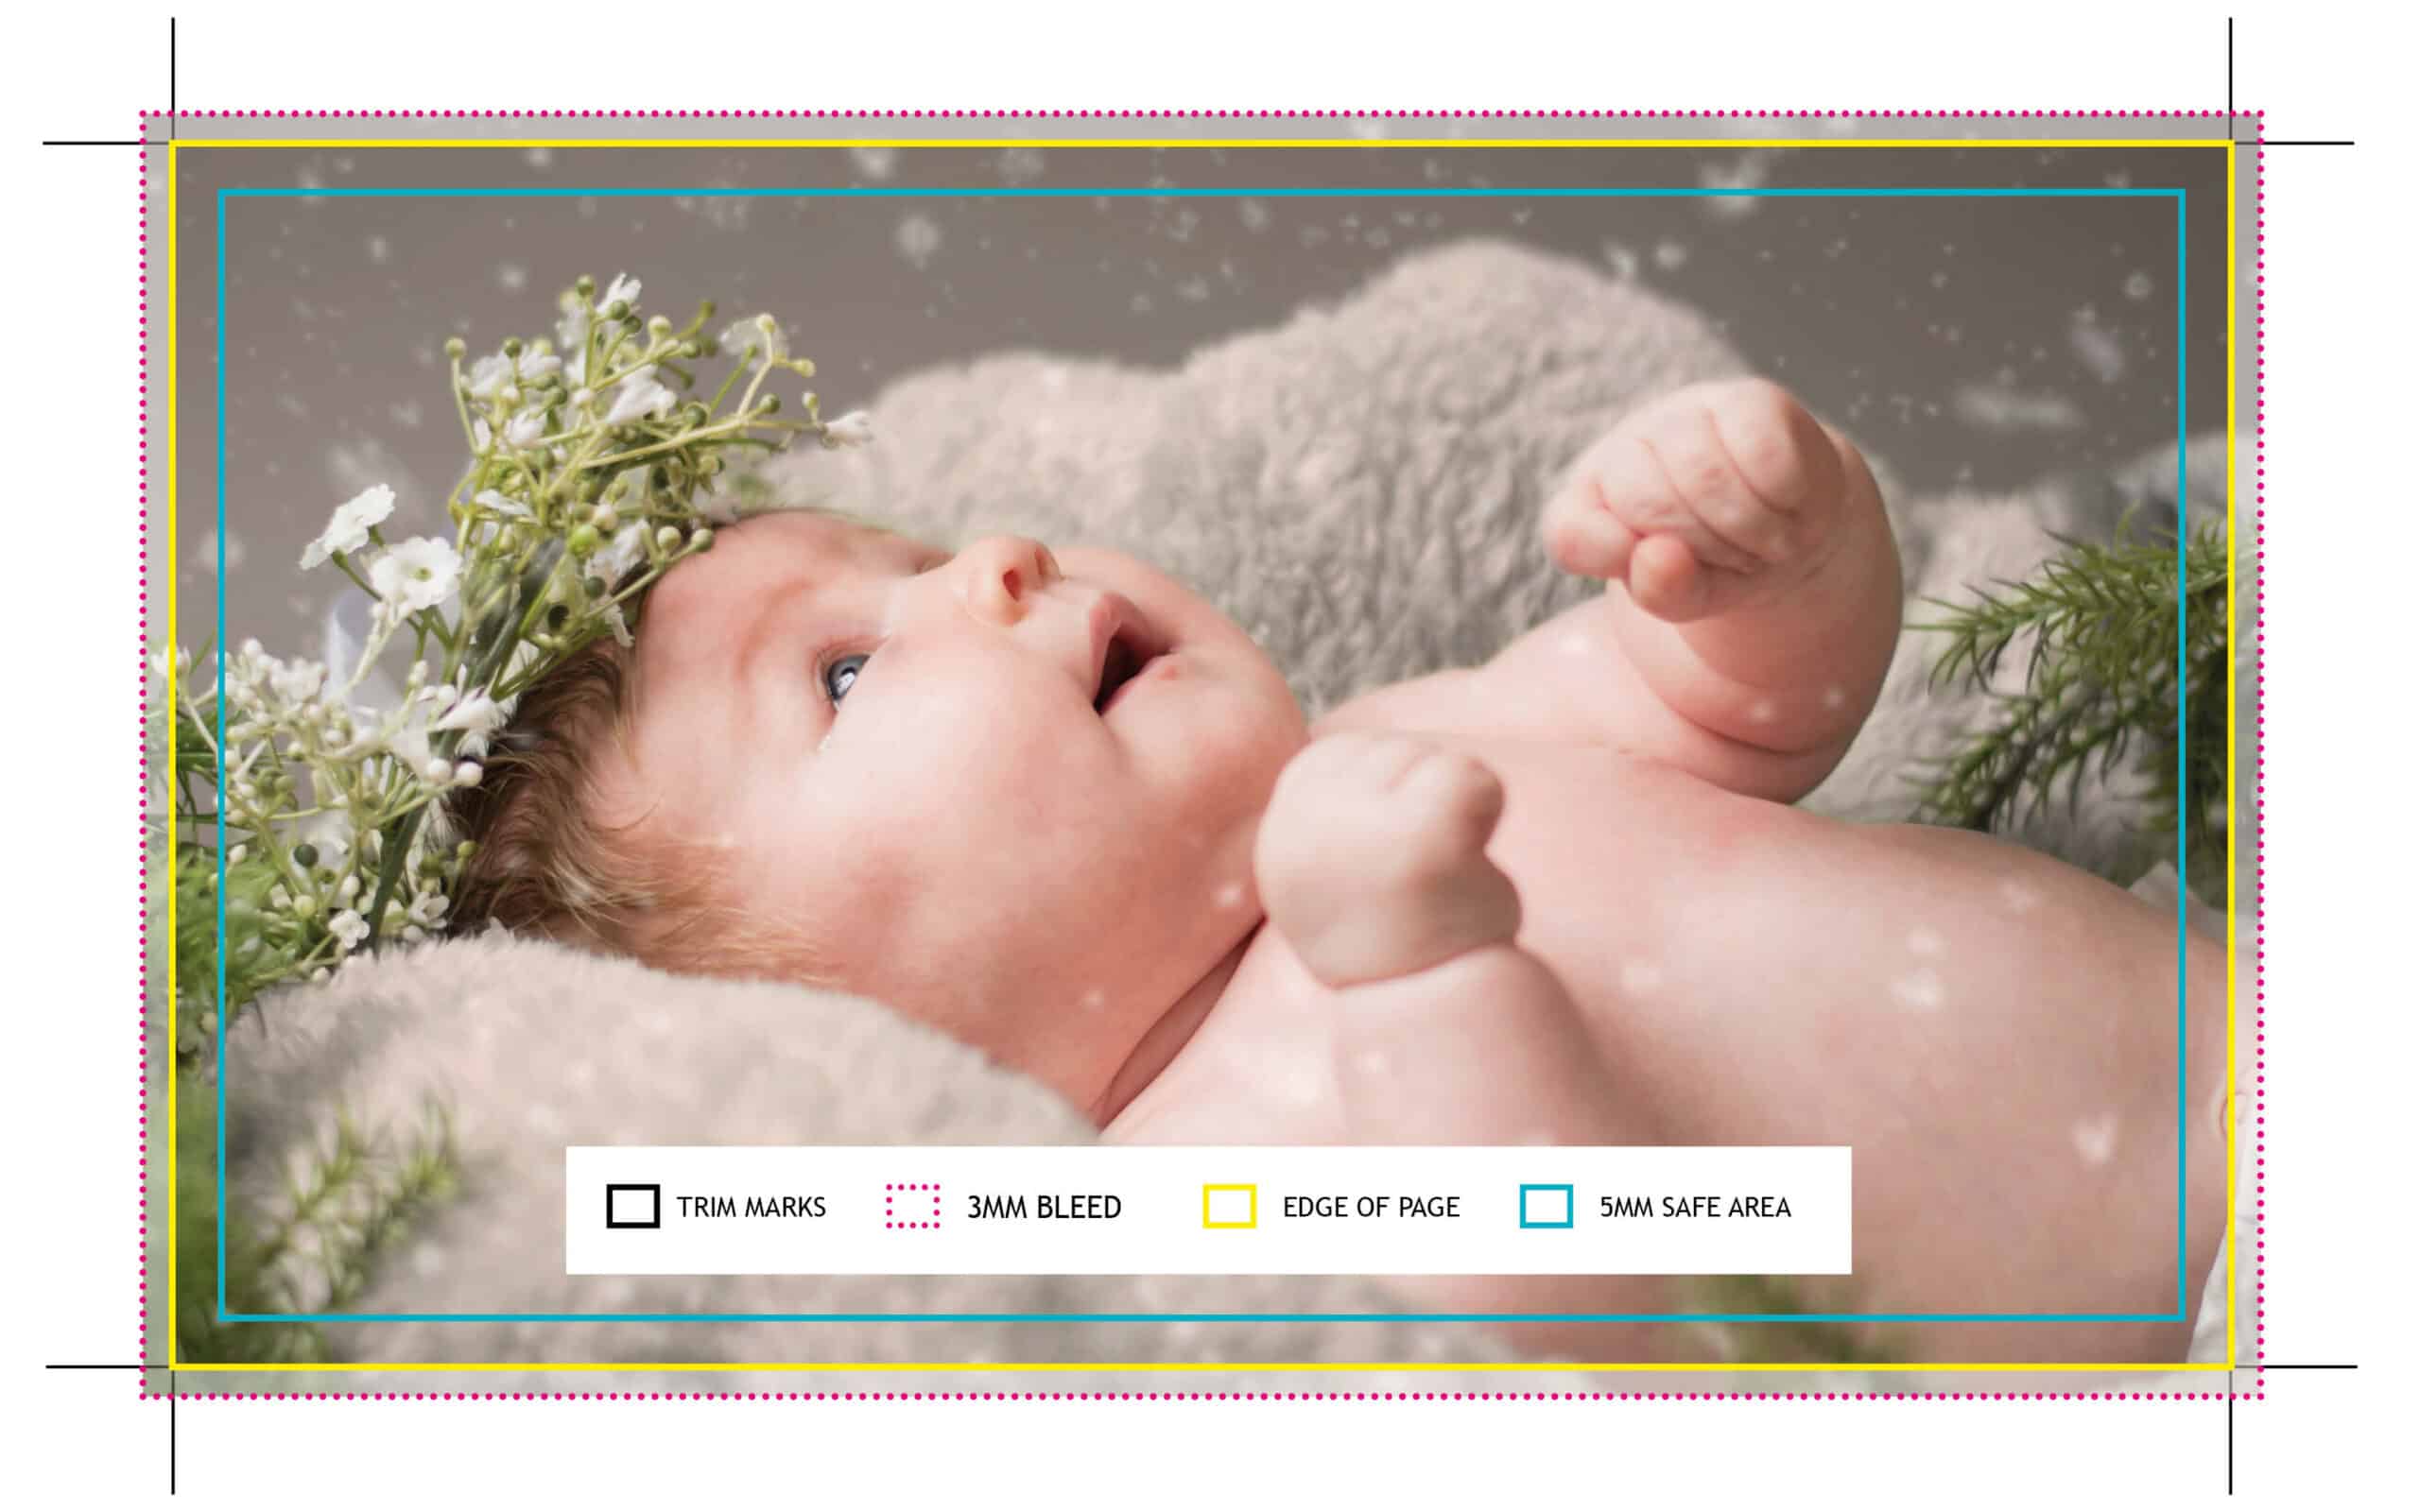
Bleed means extending the printed area slightly, typically by 3mm on each side. This extra space allows us to cut into it without risking any white edges. For example, if you want us to print a business card that’s 85mm x 55mm with a solid red background, provide artwork with a solid red area of 91mm x 61mm. The 3mm bleed will be removed during cutting, leaving the finished cards at 85mm x 55mm. Keep important content away from the bleed area (5mm is recommended)

Trim (Crop) Marks
If your software allows, always add trim marks where bleed is needed. Trim marks are small lines indicating where the page ends and the bleed begins. These marks guide the guillotine cut to ensure the correct print size. Place trim marks away from the edge of the finished page size to avoid them appearing on the prints after cutting. We recommend setting an offset of 3mm to prevent them from entering the bleed area. If you need assistance setting-up artwork with bleed and trim marks, please don’t hesitate to contact us. If you can’t provide artwork with these elements, we can add them for a small artwork charge whenever possible.


Fonts

Are you ready to make your commercial print documents stand out from the crowd with dazzling fonts? We’ve got your back, and we’re thrilled to help you embark on this fontastic adventure! Let’s dive in with excitement and eagerness to see your creations flourish!

1. Font Licensing – Dot All Your i’s and Cross All Your t’s!

Before you kickstart your font extravaganza, let’s ensure you have the right license for each font. Licensing is like the magical key that unlocks the door to fontland! Make sure you’ve read and understood the End User License Agreement (EULA) for each font you plan to use. Some fonts come with specific restrictions, while others are free to unleash your creativity.

2. High-Quality Fonts – Where Beauty Meets Professionalism!

Remember, in the world of commercial print, quality is queen (and king)! Choose fonts that look stunning and maintain their sharpness when printed. Scalability is crucial too; ensure your fonts won’t blur or pixelate when resized. Opt for OpenType fonts whenever possible, as they offer a treasure trove of features like ligatures, swashes, and alternate characters that add an extra splash of style to your designs!

3. Collect and Organize Your Fonts – Let the Font Fiesta Begin!

Time to gather your font-tastic arsenal! Create a special folder on your computer or cloud storage to keep all your fonts together. Organize them neatly by categories, themes, or styles, making it a breeze to find the perfect match for any project. Your enthusiasm for organization will ensure you spend less time hunting for fonts and more time creating magnificent designs!

4. Font Compatibility – Make Peace, Not War!

The secret to a harmonious design lies in font compatibility. While it might be tempting to mix and match a dozen different typefaces, it’s best to limit yourself to a select few. Ensure your chosen fonts complement each other and create a balanced, cohesive look. Trust us, a well-chosen pair of fonts can work wonders and make your commercial print documents sing!

5. Embed Fonts – Set Your Creativity Free!

Picture this: You’ve crafted a design masterpiece, and now it’s time to share it with the world. But, uh-oh, the fonts aren’t displaying correctly on someone else’s computer! Fear not, dear creator! By embedding your fonts into the document, you guarantee that your design will look jaw-droppingly fabulous on any device. No more font mishaps, only endless admiration for your artistry!

6. Proofread and Double-Check – Avoid the Oopsies!

It’s a party foul to let typos and misspellings crash your design celebration! Always, always, always proofread your content before sending it off to the printer. Your keen eye for detail will ensure that your commercial print documents are nothing short of perfection!

7. Share Your Font Choices – Spread the Font Joy!

Do you ever look at a beautiful design and wonder, “Which font is that?” Share the font love with others by including a font list or credits page in your commercial print documents. You’ll make your fellow designers swoon and help them discover new font treasures!

With these fontastic tips, you’re now fully equipped to create commercial print documents that dazzle and delight! Embrace the world of typography, let your creativity flow, and turn your designs into masterpieces that leave a lasting impression. Happy font hunting and happy creating! 🌟🎉

Uploading Artwork

The most convenient way to submit your artwork is through our website using the ‘Get a Quote’ form. This form allows you to securely upload your file directly to us. If your artwork consists of multiple files, simply bundle them into a single zip folder and send it our way.

Creating Zip Folders
To create a zip folder, follow these steps:

1. Highlight all the files you want to send us.
2. Right-click on the selected files.
3. In the context menu that appears, look for the ‘Send to’ option.
4. Click on ‘Send to,’ and a submenu will appear.
5. Choose ‘Compressed Folder’ from the submenu.
6. A window will open, guiding you through the process of creating a zipped folder. Follow the prompts.
7. Send us the resulting zip folder, and we’ll take it from there.

Note: If you’re using a Mac, the process is similar. Instead of ‘Send to,’ you’ll find an option called ‘Compress.’ Select ‘Compress,’ and a zip file will be created.

WeTransfer
For files larger than 24MB, we recommend using WeTransfer.